Having Bleed in Your Document
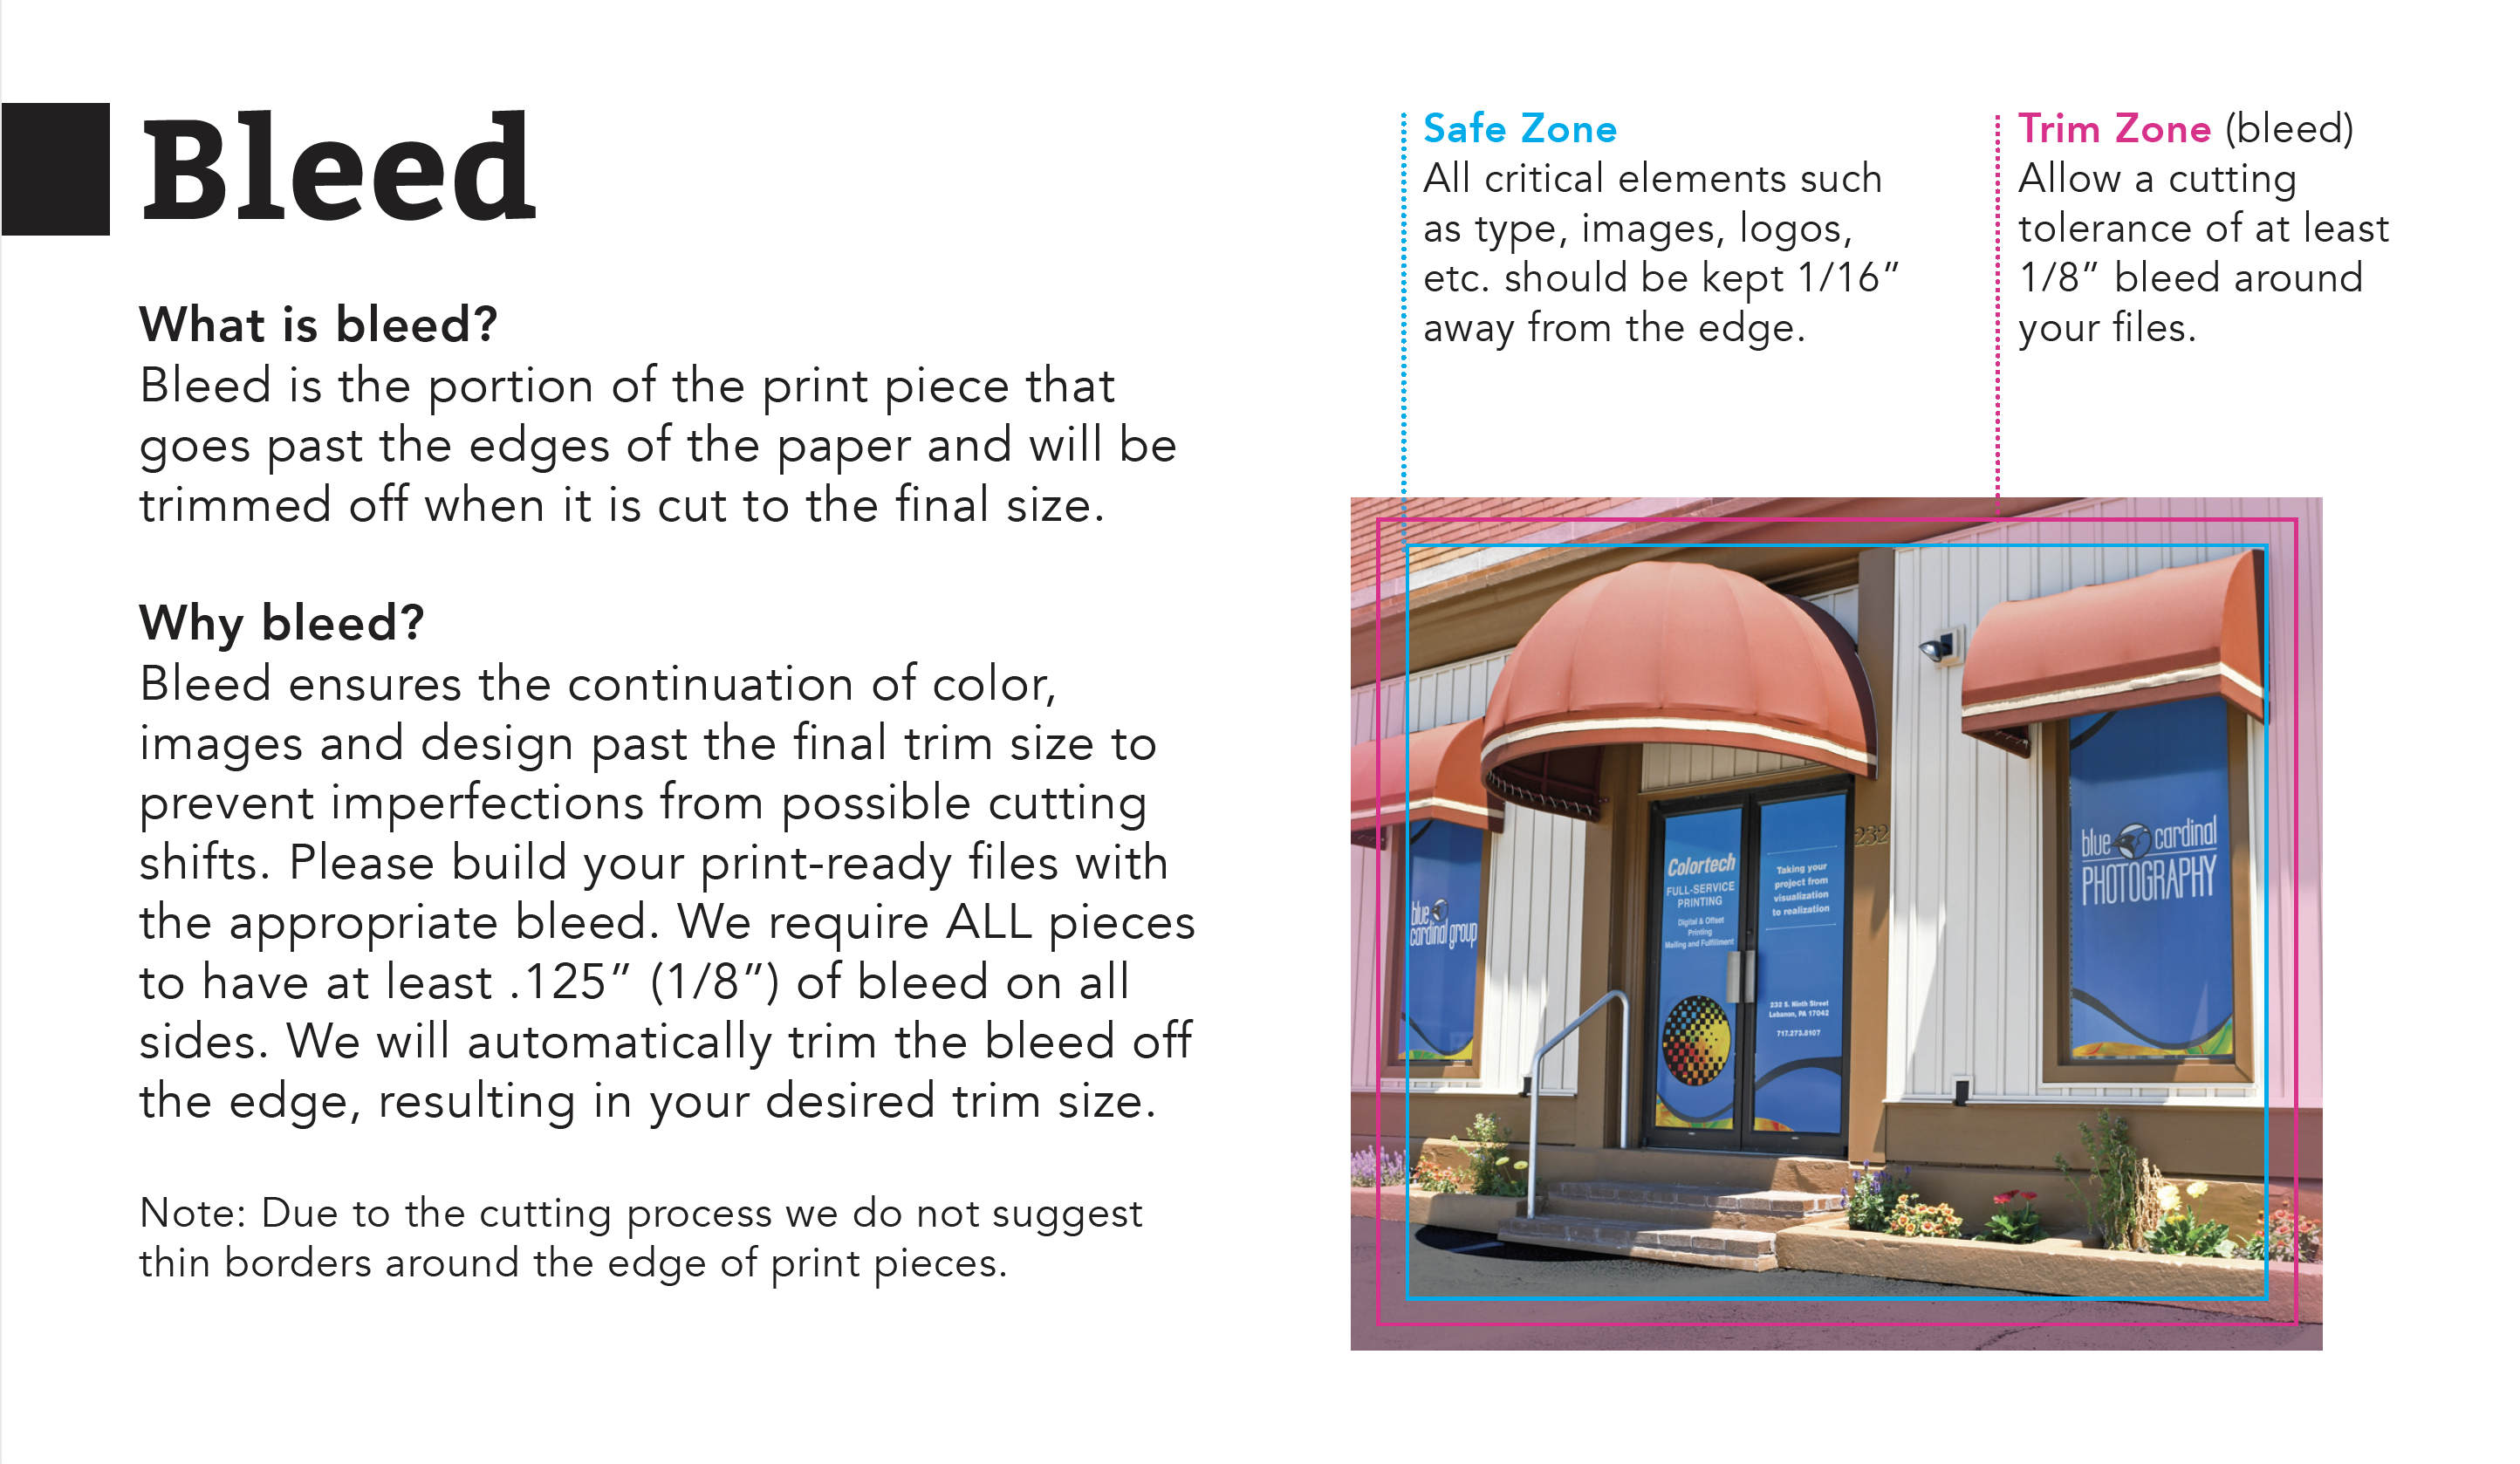
What is bleed?
Bleed goes past the edges of the paper. After printing, our bindery employees will trim the paper to the final size. Having bleed in your document makes it much easier for a printer to print the piece in the way it was intended.
Why bleed?
Bleed ensures the continuation of color, images, and design past the final trim size to prevent imperfections from possible cutting shifts. We require ALL pieces to have at least .125” (1/8”) of bleed on all sides that trim. We will automatically trim the bleed off the edge, resulting in your desired trim size.
How to add bleed to a document
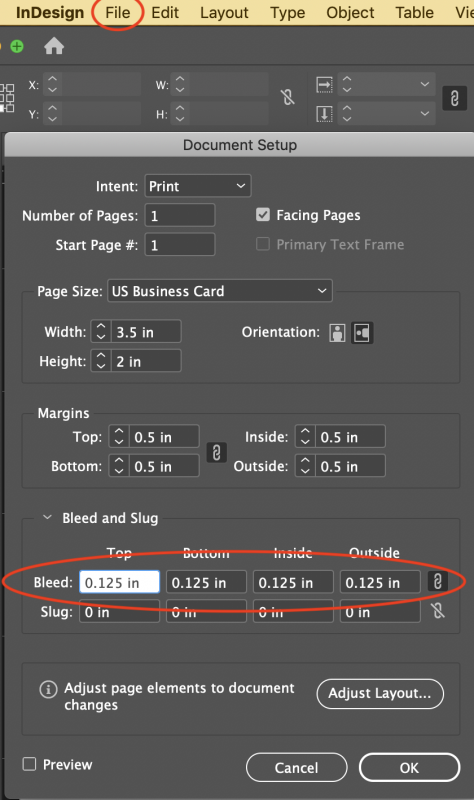
We suggest you use InDesign for your print layout files. To add bleed in InDesign, you can go to File > Document Set Up > Bleed. In the box, type .125. Make sure it is copied to each side that will be trimmed. After your document has the bleed added, extend any image or color that goes up to the edge into that bleed area. Note: Make sure to keep text about .25″ away from the edge of the trim to ensure it will print properly. We cannot always guarantee that objects beyond this edge will properly make it through the cutting process.
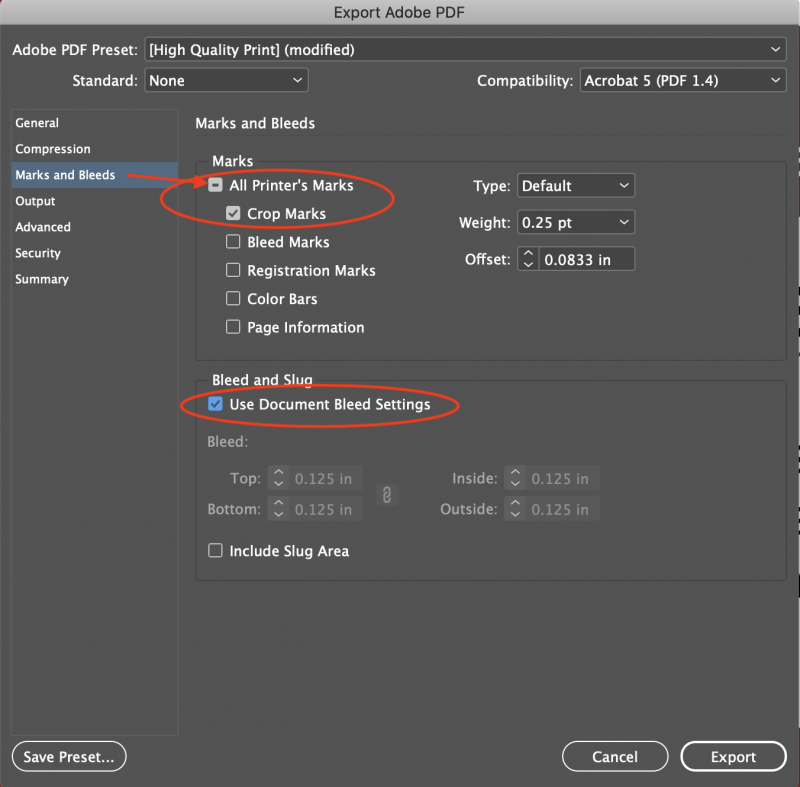
Add bleed when exporting a PDF
When you export the file as a PDF, make sure to go to Marks and Bleed and check Use Document Bleed Settings and Crop Marks. You and the printer will see the crop marks and know where to cut. You do not need to check “Bleed Marks,” but you can if you wish for extra assurance.
Troubleshooting:
If you’re in need of more detailed assistance, you can check out Adobe’s direct help center on bleed on their website.